Installing
Aftermarket Motor Mounts
by: poc301
This guide is intended to give a step by step set of instructions
to install a set of performance dogbone motor mounts on a Saturn.
I have a 2000 SL2 (3rd gen), and my buddy Langston has a 1st gen
(94 or 95) SL2, and the install was identical for both our cars.
I bought the set of polyeurothane motor mounts from Saturn Motorsports for $130,
which is the same price their competitor Twistec sells their mounts
for. Please note that the SM and Twistec products are identical.
Langston got himself the Twistec products, and I couldn't tell the
difference between his and mine.
set of polyeurothane motor mounts from Saturn Motorsports for $130,
which is the same price their competitor Twistec sells their mounts
for. Please note that the SM and Twistec products are identical.
Langston got himself the Twistec products, and I couldn't tell the
difference between his and mine.
There are three mounts on the Saturn 1.9l motor. The torque axis
mount is on top of the motor on the passenger side. It can not be
modified to be stronger because it can cause the timing chain cover
to crack. This leaves our options for motor mounts to the 2 dog-bone
mounts. One is located behind the passenger side front wheel, directly
under the crank pulley. The other is located on the driver side
near the top of the engine, directly underneath the battery tray.
These motor mounts use a polyeurothane insert (red) as opposed
to the rubber inserts the stock mounts use. This stronger material
keeps the engine from moving as much when you press the gas, allowing
more torque to be transferred to the pavement. The mounts cause
a slight increase in vibration when sitting still, and a bit of
a vibration increase at low RPMs. Mid to high rpms don't feel any
different vibration-wise. Here is a picture of the two mounts side
by side. The red and silver one is the SM unit.
Step 1: The Bottom Motor Mount
The mount is located behind the front passenger side wheel.
Loosen the lugnuts on the wheel. Jack up the front passenger side
of the vehicle, and make sure to secure it with a jack-stand. Remove
the wheel and the plastic fender lining so that you can see the
crank pulley and the lower portion of the motor.
You will be able to see the stock dogbone mount directly below
the crank pulley.
Now use a floor jack and jack up the motor by the oil pan. Lifting
the engine up slightly releases the tension on the dogbone mounts,
allowing you to remove them easier. Make sure to use a small piece
of wood or something to distribute the weight over a larger area
on the oil pan. Failure to do this will lead to a dented oil pan
 After
you use a socket to remove the 2 bolts holding the dogbone to its
mount, its time to use another jack and raise the hub assembly.
I have found that doing this allows the mount to slide out MUCH
easier. You will want to raise it until the rubber boot is angling
up, and there is enough room to simply slide the stock mount out
of its bracket. After
you use a socket to remove the 2 bolts holding the dogbone to its
mount, its time to use another jack and raise the hub assembly.
I have found that doing this allows the mount to slide out MUCH
easier. You will want to raise it until the rubber boot is angling
up, and there is enough room to simply slide the stock mount out
of its bracket.
Once you slide the old mount out, slide the new mount in. It may
take a few minutes to get the holes lined up properly, but once
done, simply screw the 2 bolts back in, and you're set. Make SURE
to remember which bolt goes in which hole. One is longer than the
other, and it will only work one way. When installed, your new mount
will look like this:
You can now let the hub assembly down, but leave the oil pan jacked
up for the top mount change.
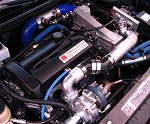
Step 2: The Top Motor Mount
This is about how the engine will look prior to beginning (your
mods may differ):
Start by removing the air filter.
Next remove the intake tubing.
You are now able to see the stock dogbone mount.
Remove the two bolts that hold it in place, and install the new
mount. This is the easiest mount to change.
Then re-install all the intake equipment, lower the jack from the
oil pan, reinstall the wheel and lower the car. Enjoy the new mounts!
Final Thoughts
I went into this install job having done it already several times.
It is a simple job.
Overall I love the new motor mounts. They make the car idle a little
rougher, and vibrate a bit more at lower RPMs, but the throttle
response, and stronger acceleration make up for it. I can't wait
to try it out with my nitrous when I finish breaking in the new
motor.
|


The turbosaturns.net
forum has become one of the best resources for Saturn performance
on the net. Our members are constantly pushing their cars to new
performance levels. So, log in, share your ideas, and help push
your car’s performance to the next level.

Archived Articles

August 2005 TSN will be holding its first ever meet
in Chardon, Ohio. Some of the fastest Saturns in the country will
be attending. Activities will include drag racing, dyno, tech session,
and BBQ. Look for the latest information in the forums.

Different
Racing

Jeff and his team Different Racing have big plans
on breaking into some really low quarter mile times this year. Last
year he posted a 12.40 on a pretty healthy nitrous shot. This year
he has a new turbo setup and some serious determination. Visit his
website for the latest news and information. I expect we'll be seeing
some low 12's from him by the end of the year.
|