|
Street Class Unlimited Class
DOHC SOHC Ion Updated 1/05 For the most recent list of the fastest five cars click here. |
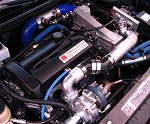
D.I.Y. Turbo Rebuildby: ttLtrSl2
A few thousand miles after the turbo was installed, it was time for a rebuild. There were some signs of bad oil gasket seals, which made for a smoky drive. When it was time for the rebuild, I needed to find a place that offered a kit for my T3 turbo. What better place to look then a Saab performance shop, since the turbo came from a Saab. I came across http://www.saabperformanceparts.com/ and http://www.saabperformanceparts.com/item107.htm and decided to give them a call. They were very helpful and answered all my questions about the rebuild. About $100 and a few days later I got my rebuild kit in the mail. The kit was pretty simple. It consisted of new bearings, gaskets, ring gasket (similar to that of a piston ring) bolts, and ¾ circle metal plate that I have no clue what it is called. On with the rebuild! I decided to completely disassemble the turbo before cleaning anything. I marked the compressor and exhaust housing in relation to the center section. This made it easier to install the turbo back into the car, since everything will be as I left it. With the turbo off the car, I removed the compressor housing, which was held on by six13mm bolts. The wastegate actuator was removed during this step as it is affixed to the compressor housing. Then I removed the wastegate (five 13mm bolts) from the exhaust housing. Then I removed the exhaust housing (six 13mm bolts) from the center section of the turbo. The exhaust housing bolts were tough; therefore I soaked them with Liquid wrench a few times before I was able to remove them. I was now down to the main part of the turbo, the center section. This is the brain of the turbo. At this point the compressor and exhaust compressor wheels were accessible. To my surprise they were in excellent condition, minus some carbon build up on the exhaust side. The next step was to remove the impeller and the shaft. This was a very delicate step. It is very easy to bend the impeller shaft if it is not removed carefully. Before removing the impeller and shaft, I marked the position of the shaft in relation to the impeller on the compressor side. This allowed me to reinstall the shaft and impellor back to OEM balancing spec. If they were not realigned properly, this would throw off the balance of the turbo and could cause premature failure. There is a nut on the compressor side of the shaft. The exhaust side of the shaft had a weird triangle head. Luckily, I was able to use a 14mm wrench on it. Using a larger adjustable wrench (for leverage) on the compressor side and the 14mm on the exhaust side of the shaft, I was able to break the nut loose. The impeller and shaft are pressed together. I very carefully pulled the impellor off the shaft. The back plate (four 10mm bolts) to the compressor house was now able to be removed from the center section. Inside was a bushing with a ring gasket and the ¾ circle metal plate. I removed these from the shaft, then removed the ring gasket from the bushing. I was now able to remove the shaft by sliding it through the center section. On the exhaust side of the shaft there was another ring gasket that had to be removed. The bearings were visible now. They are held in place with the retaining rings. Remove the retaining ring, and then remove the bearing. The exhaust and compressor bearings are removed the same way. The bearing removal was the last step in the disassembly process. Now on to the cleaning. I was told not to get any cleaners inside of the center section, so I set that aside while I cleaned everything else. I used Liquid wrench, a tooth brush, Q-tips, and rags to clean everything. Basically, I was removing any carbon build-up or any other crud I came across. I only used Q-tips to clean out the center section where the bearings are seated. After everything was clean I was now ready to prep the parts to reassemble. It is recommended that the new bearings are coated with oil before they installed. Everything gets installed in reverse. First I installed the bearing into the center section. Then I carefully installed the ring gasket onto the exhaust side for the shaft. I was careful not to stretch the ring gasket out. This could cause oil leakage or blow by. I then slid the shaft through the center section. Then I carefully installed the other ring gasket onto the bushing. I then installed the ¾ circle metal plate and bushing onto the shaft. Then the compressor back plate was bolted to the center section. Next the compressor impellor was installed. I carefully pressed the impellor onto the shaft and made sure that I lined up the marking, and then installed the bolt. AGAIN lining up the impeller to the shaft is very crucial to the balancing and life of the turbo. Now the compressor with new gasket and exhaust housing were installed. I made sure to line up all the markings from when they were removed. Then the wastegate and the wastegate actuator were installed. Before I installed the turbo back on the car, I blocked the oil feed and poured some oil into the return side of the center section. I spun the shaft by hand for a little while to lube up all the parts. Then I drained the oil and reinstalled the turbo on the car. The turbo was rebuilt a few thousand miles ago and so far everything seems to be ok. |
|